Introduction
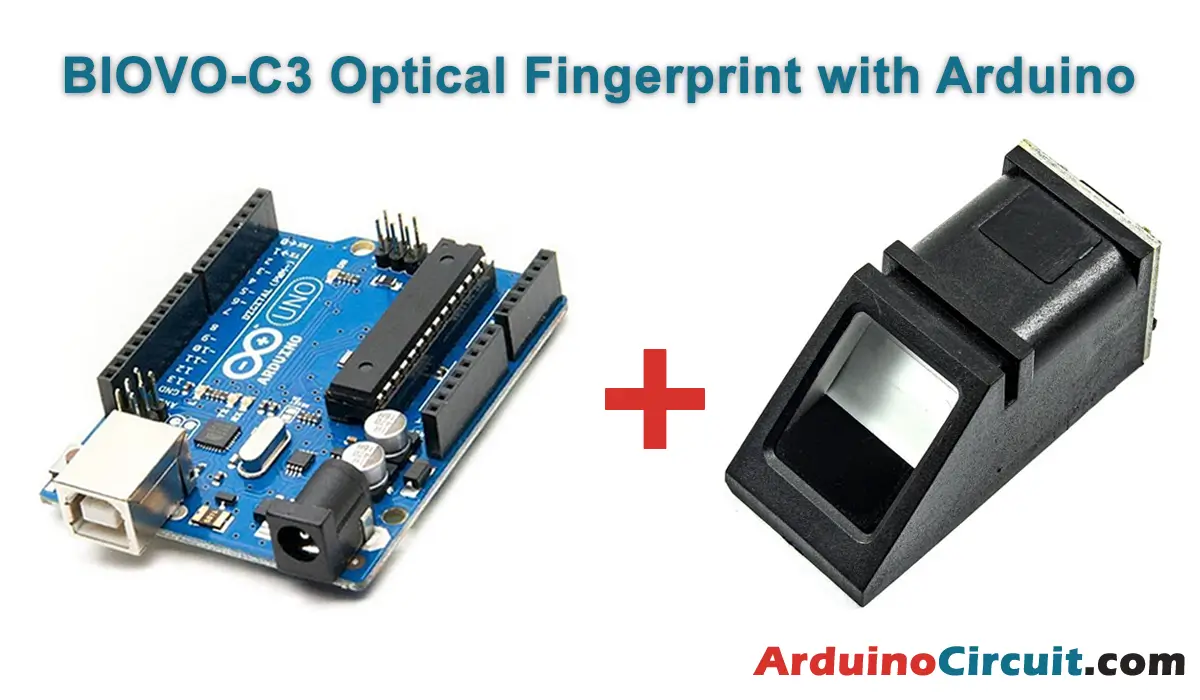
In this tutorial we learn about BIOVO-C3 Optical Fingerprint Sensor Module | Arduino Tutorial, In the realm of biometric technology, fingerprint recognition continues to be a widely utilized and reliable method for authentication. To simplify the integration of fingerprint recognition into projects, the BIOVO-C3 Optical Fingerprint Sensor Module offers an efficient and user-friendly solution.
This module, when paired with an Arduino UNO, enables seamless implementation of fingerprint recognition capabilities. In this tutorial, we will explore the BIOVO-C3 module and provide step-by-step instructions on how to set it up with an Arduino UNO, opening doors to a world of secure and convenient biometric authentication.
Hardware Required
You will require the following Hardware Components for interfacing BIOVO-C3 Optical Fingerprint Sensor Module | Arduino Tutorial
| Components | # | Buy From Amazon |
|---|---|---|
| Arduino UNO | 1 | Buy Now |
| BIOVO-C3 Optical Fingerprint Module | 1 | Buy Now |
| Jumper Wires | 4 | Buy Now |
| Breadboard | 1 | Buy Now |
What is BIOVO-C3 Optical Fingerprint Sensor?
The BIOVO-C3 Optical Fingerprint Sensor Module is a compact and versatile biometric device that utilizes optical technology to capture and recognize fingerprints. It features a high-resolution optical sensor that captures precise fingerprint images, allowing for reliable identification and verification. The module incorporates advanced algorithms for fingerprint processing, making it a robust and efficient solution.
Pinout

Pin Configuration
| Pin Name | Pin Type |
|---|---|
| 5V | Positive supply 5v |
| GND | Ground Pin |
| RX | Receive data from serial communication |
| TX | Send data from serial communication |
Specifications of BIOVO-C3 Optical Fingerprint
- Sensor resolution and image quality: The module boasts a high-resolution optical sensor, ensuring accurate and clear fingerprint capture.
- Fingerprint recognition speed: The BIOVO-C3 offers fast recognition speed, minimizing authentication time.
- False acceptance rate (FAR) and false rejection rate (FRR): The module excels in reducing false acceptance and rejection rates, enhancing security.
- Operating voltage and power consumption: It operates at a low voltage and consumes minimal power, making it suitable for various applications.
- Communication interface and compatibility with Arduino UNO: The module supports a simple serial communication interface and is compatible with Arduino UNO.
Features of BIOVO-C3 Optical Fingerprint
- High accuracy and reliability in fingerprint recognition: The module ensures accurate and dependable fingerprint recognition, minimizing unauthorized access.
- Fast and efficient fingerprint capture and matching process: It captures fingerprints swiftly and matches them against stored templates for quick authentication.
- Easy integration with Arduino UNO: The module comes with Arduino libraries and example codes, simplifying the integration process.
- Secure storage of fingerprint templates: Fingerprint templates are securely stored within the module, ensuring the privacy and confidentiality of user data.
- Compact and lightweight design: The BIOVO-C3 module features a compact and lightweight design, allowing for easy integration into various projects.
- Versatile applications: The module finds applications in access control systems, time and attendance management, and secure personal devices, among others.
Working of BIOVO-C3 Optical Fingerprint
The BIOVO-C3 Optical Fingerprint Sensor Module operates on the principle of optical fingerprint recognition. It utilizes an advanced optical sensor to capture precise images of fingerprints, enabling reliable identification and verification.
When a finger is placed on the sensing area of the module, the optical sensor emits light onto the finger’s surface. The light is reflected back and captured by an array of sensors within the module. These sensors measure the intensity of the reflected light, creating a digital image of the fingerprint.
The captured fingerprint image is then processed using advanced algorithms embedded in the module. These algorithms analyze the unique ridge patterns, minutiae points, and other distinctive features of the fingerprint. By comparing these features with the stored fingerprint templates, the module determines whether there is a match or not.
Circuit Diagram
The following circuit shows you the connection of the R308 Fingerprint Sensor | Arduino Tutorial Please make the connection carefully

Circuit Connections
| Arduino | Fingerprint Sensor |
|---|---|
| +5V | VCC Pin |
| GND | GND Pin |
| D2 | TX |
| D3 | RX |
Installing Arduino IDE Software
First, you will require to Download the updated version of Arduino IDE Software and Install it on your PC or laptop. if you Learn How to install the Arduino step-by-step guide then click on how to install Arduino Button given Blow
Installing Libraries
Now when you are Ready to upload the code, to the Arduino Board you will need first to add the Following Libraries in Arduino, If you Learn How to add the library in the Arduino step-by-step guide click on how to install the library Button given Blow
Code
Upload the following code to your Arduino.
//For more Projects: www.arduinocircuit.com

#include <Adafruit_Fingerprint.h>

// On Leonardo/Micro or others with hardware serial, use those! #0 is green wire, #1 is white
// uncomment this line:
// #define mySerial Serial1

// For UNO and others without hardware serial, we must use software serial...
// pin #2 is IN from sensor (GREEN wire)
// pin #3 is OUT from arduino  (WHITE wire)
// comment these two lines if using hardware serial
SoftwareSerial mySerial(2, 3);

Adafruit_Fingerprint finger = Adafruit_Fingerprint(&mySerial);

uint8_t id;

void setup()
{
  Serial.begin(9600);
  while (!Serial);  // For Yun/Leo/Micro/Zero/...
  delay(100);
  Serial.println("\n\nAdafruit Fingerprint sensor enrollment");

  // set the data rate for the sensor serial port
  finger.begin(57600);

  if (finger.verifyPassword()) {
    Serial.println("Found fingerprint sensor!");
  } else {
    Serial.println("Did not find fingerprint sensor :(");
    while (1) { delay(1); }
  }
}

uint8_t readnumber(void) {
  uint8_t num = 0;

  while (num == 0) {
    while (! Serial.available());
    num = Serial.parseInt();
  }
  return num;
}

void loop()                     // run over and over again
{
  Serial.println("Ready to enroll a fingerprint!");
  Serial.println("Please type in the ID # (from 1 to 127) you want to save this finger as...");
  id = readnumber();
  if (id == 0) {// ID #0 not allowed, try again!
     return;
  }
  Serial.print("Enrolling ID #");
  Serial.println(id);

  while (!  getFingerprintEnroll() );
}

uint8_t getFingerprintEnroll() {

  int p = -1;
  Serial.print("Waiting for valid finger to enroll as #"); Serial.println(id);
  while (p != FINGERPRINT_OK) {
    p = finger.getImage();
    switch (p) {
    case FINGERPRINT_OK:
      Serial.println("Image taken");
      break;
    case FINGERPRINT_NOFINGER:
      Serial.println(".");
      break;
    case FINGERPRINT_PACKETRECIEVEERR:
      Serial.println("Communication error");
      break;
    case FINGERPRINT_IMAGEFAIL:
      Serial.println("Imaging error");
      break;
    default:
      Serial.println("Unknown error");
      break;
    }
  }

  // OK success!

  p = finger.image2Tz(1);
  switch (p) {
    case FINGERPRINT_OK:
      Serial.println("Image converted");
      break;
    case FINGERPRINT_IMAGEMESS:
      Serial.println("Image too messy");
      return p;
    case FINGERPRINT_PACKETRECIEVEERR:
      Serial.println("Communication error");
      return p;
    case FINGERPRINT_FEATUREFAIL:
      Serial.println("Could not find fingerprint features");
      return p;
    case FINGERPRINT_INVALIDIMAGE:
      Serial.println("Could not find fingerprint features");
      return p;
    default:
      Serial.println("Unknown error");
      return p;
  }

  Serial.println("Remove finger");
  delay(2000);
  p = 0;
  while (p != FINGERPRINT_NOFINGER) {
    p = finger.getImage();
  }
  Serial.print("ID "); Serial.println(id);
  p = -1;
  Serial.println("Place same finger again");
  while (p != FINGERPRINT_OK) {
    p = finger.getImage();
    switch (p) {
    case FINGERPRINT_OK:
      Serial.println("Image taken");
      break;
    case FINGERPRINT_NOFINGER:
      Serial.print(".");
      break;
    case FINGERPRINT_PACKETRECIEVEERR:
      Serial.println("Communication error");
      break;
    case FINGERPRINT_IMAGEFAIL:
      Serial.println("Imaging error");
      break;
    default:
      Serial.println("Unknown error");
      break;
    }
  }

  // OK success!

  p = finger.image2Tz(2);
  switch (p) {
    case FINGERPRINT_OK:
      Serial.println("Image converted");
      break;
    case FINGERPRINT_IMAGEMESS:
      Serial.println("Image too messy");
      return p;
    case FINGERPRINT_PACKETRECIEVEERR:
      Serial.println("Communication error");
      return p;
    case FINGERPRINT_FEATUREFAIL:
      Serial.println("Could not find fingerprint features");
      return p;
    case FINGERPRINT_INVALIDIMAGE:
      Serial.println("Could not find fingerprint features");
      return p;
    default:
      Serial.println("Unknown error");
      return p;
  }

  // OK converted!
  Serial.print("Creating model for #");  Serial.println(id);

  p = finger.createModel();
  if (p == FINGERPRINT_OK) {
    Serial.println("Prints matched!");
  } else if (p == FINGERPRINT_PACKETRECIEVEERR) {
    Serial.println("Communication error");
    return p;
  } else if (p == FINGERPRINT_ENROLLMISMATCH) {
    Serial.println("Fingerprints did not match");
    return p;
  } else {
    Serial.println("Unknown error");
    return p;
  }

  Serial.print("ID "); Serial.println(id);
  p = finger.storeModel(id);
  if (p == FINGERPRINT_OK) {
    Serial.println("Stored!");
  } else if (p == FINGERPRINT_PACKETRECIEVEERR) {
    Serial.println("Communication error");
    return p;
  } else if (p == FINGERPRINT_BADLOCATION) {
    Serial.println("Could not store in that location");
    return p;
  } else if (p == FINGERPRINT_FLASHERR) {
    Serial.println("Error writing to flash");
    return p;
  } else {
    Serial.println("Unknown error");
    return p;
  }
}
Open the Serial monitor once the code is uploaded.
The device is waiting for you to enter an ID.
Code 2
After defining your fingerprint, upload the following code to Arduino.
//For more Projects: www.arduinocircuit.com

#include <Adafruit_Fingerprint.h>

// On Leonardo/Micro or others with hardware serial, use those! #0 is green wire, #1 is white
// uncomment this line:
// #define mySerial Serial1

// For UNO and others without hardware serial, we must use software serial...
// pin #2 is IN from sensor (GREEN wire)
// pin #3 is OUT from arduino  (WHITE wire)
// comment these two lines if using hardware serial
SoftwareSerial mySerial(2, 3);

Adafruit_Fingerprint finger = Adafruit_Fingerprint(&mySerial);

void setup()
{
  Serial.begin(9600);
  while (!Serial);  // For Yun/Leo/Micro/Zero/...
  delay(100);
  Serial.println("\n\nAdafruit finger detect test");

  // set the data rate for the sensor serial port
  finger.begin(57600);

  if (finger.verifyPassword()) {
    Serial.println("Found fingerprint sensor!");
  } else {
    Serial.println("Did not find fingerprint sensor :(");
    while (1) { delay(1); }
  }

  finger.getTemplateCount();
  Serial.print("Sensor contains "); Serial.print(finger.templateCount); Serial.println(" templates");
  Serial.println("Waiting for valid finger...");
}

void loop()                     // run over and over again
{
  getFingerprintIDez();
  delay(50);            //don't ned to run this at full speed.
}

uint8_t getFingerprintID() {
  uint8_t p = finger.getImage();
  switch (p) {
    case FINGERPRINT_OK:
      Serial.println("Image taken");
      break;
    case FINGERPRINT_NOFINGER:
      Serial.println("No finger detected");
      return p;
    case FINGERPRINT_PACKETRECIEVEERR:
      Serial.println("Communication error");
      return p;
    case FINGERPRINT_IMAGEFAIL:
      Serial.println("Imaging error");
      return p;
    default:
      Serial.println("Unknown error");
      return p;
  }

  // OK success!

  p = finger.image2Tz();
  switch (p) {
    case FINGERPRINT_OK:
      Serial.println("Image converted");
      break;
    case FINGERPRINT_IMAGEMESS:
      Serial.println("Image too messy");
      return p;
    case FINGERPRINT_PACKETRECIEVEERR:
      Serial.println("Communication error");
      return p;
    case FINGERPRINT_FEATUREFAIL:
      Serial.println("Could not find fingerprint features");
      return p;
    case FINGERPRINT_INVALIDIMAGE:
      Serial.println("Could not find fingerprint features");
      return p;
    default:
      Serial.println("Unknown error");
      return p;
  }

  // OK converted!
  p = finger.fingerFastSearch();
  if (p == FINGERPRINT_OK) {
    Serial.println("Found a print match!");
  } else if (p == FINGERPRINT_PACKETRECIEVEERR) {
    Serial.println("Communication error");
    return p;
  } else if (p == FINGERPRINT_NOTFOUND) {
    Serial.println("Did not find a match");
    return p;
  } else {
    Serial.println("Unknown error");
    return p;
  }

  // found a match!
  Serial.print("Found ID #"); Serial.print(finger.fingerID);
  Serial.print(" with confidence of "); Serial.println(finger.confidence);

  return finger.fingerID;
}

// returns -1 if failed, otherwise returns ID #
int getFingerprintIDez() {
  uint8_t p = finger.getImage();
  if (p != FINGERPRINT_OK)  return -1;

  p = finger.image2Tz();
  if (p != FINGERPRINT_OK)  return -1;

  p = finger.fingerFastSearch();
  if (p != FINGERPRINT_OK)  return -1;

  // found a match!
  Serial.print("Found ID #"); Serial.print(finger.fingerID);
  Serial.print(" with confidence of "); Serial.println(finger.confidence);
  return finger.fingerID;
}
Applications of the R308 Fingerprint Sensor
- Access control systems: The module enables secure access to buildings and restricted areas, replacing traditional key-based or card-based systems with fingerprint authentication.
- Time and attendance management: It facilitates accurate tracking of employee attendance, streamlining time and attendance management processes in organizations.
- Personal device security: The module enhances the security of personal devices, such as smartphones and laptops, by replacing passwords with fingerprint recognition.
- Biometric safes and lockers: It provides secure access to safes and lockers, offering an added layer of security by requiring fingerprint authentication.
- E-commerce and payment systems: The module can be utilized in e-commerce and payment systems to authenticate users’ identities, enhancing transaction security and preventing unauthorized access.
Conclusion
The BIOVO-C3 Optical Fingerprint Sensor Module, coupled with an Arduino UNO, presents an accessible and efficient solution for implementing fingerprint recognition in various projects. Its high accuracy, fast recognition speed, and user-friendly features make it an ideal choice for applications such as access control, attendance management, and personal device security. By following this tutorial, you can unlock the potential of biometric authentication and add an extra layer of security to your projects. Embrace the BIOVO-C3 module and explore the possibilities of seamless and reliable fingerprint recognition