Introduction
This is a tutorial on How to connect a Flex Sensor with Arduino, Flex sensors are passive devices that can measure the amount of bend or deflection that occurs in a material. These sensors are widely used in various applications such as robotics, gaming controllers, medical devices, and musical instruments. The sensors are very simple and flexible and can be easily integrated into any system. This tutorial will explain how to use a flex sensor with an Arduino board.
Hardware Required
You will require the following Hardware Components for interfacing the Flex Sensor with Arduino.
| Components | # | Buy From Amazon |
|---|---|---|
| Arduino UNO | 1 | Buy Now |
| Flex Sensor | 1 | Buy Now |
| Led 5mm | 1 | Buy Now |
| Resistor 220Ω | 1 | Buy Now |
| Resistor 10KΩ | 1 | Buy Now |
| Jumper Wires | Few | Buy Now |
| Breadboard | 1 | Buy Now |
How to work Flex Sensor
A flex sensor works by changing its resistance when it is bent. The resistance of the sensor increases or decreases in proportion to the amount of bend or deflection that occurs. The sensor is made up of a thin film of conductive material that is placed between two layers of insulating material. When the sensor is bent, the conductive material inside the sensor stretches, which causes a change in the resistance of the sensor.
To use a flex sensor with an Arduino board, the sensor needs to be connected to an analog input pin of the board. The sensor’s resistance changes with the amount of bend or deflection, and this change is converted into a voltage by the Arduino’s analog-to-digital converter (ADC). The ADC reads the voltage and converts it into a digital value, which can be used by the Arduino to control other devices or perform calculations.
Specifications
- Sensitivity range: The sensor should have a wide sensitivity range to accurately detect small and large movements.
- Resistance range: The sensor’s resistance should vary according to the amount of flex it experiences.
- Response time: The sensor should have a fast response time to accurately detect changes in flex.
- Durability: The sensor should be able to withstand repeated bending without breaking or losing accuracy.
- Operating voltage: The sensor should be compatible with common operating voltages to make it easy to use with different systems.
- Temperature range: The sensor should be able to operate within a wide temperature range without losing accuracy.
- Noise resistance: The sensor should be able to filter out unwanted noise from other electronic components.
- Size and shape: The sensor should be small and flexible enough to be integrated into a variety of devices and applications.
Features
- Bend detection: The sensor can accurately detect changes in flex and translate them into useful data.
- Analog output: The sensor produces an analog output signal that can be easily processed by microcontrollers or other electronics.
- Low power consumption: The sensor is designed to consume very little power, making it ideal for battery-powered applications.
- Easy to integrate: The sensor is easy to integrate into a wide variety of devices and applications.
- Low profile: The sensor has a low profile and can be easily hidden within a device or application.
- Versatile: The sensor can be used in a wide variety of applications, including robotics, medical devices, and wearables.
- Reliable: The sensor is designed to be reliable and accurate over long periods of use.
- Cost-effective: The sensor is cost-effective and can be used in high-volume manufacturing.
Pinout

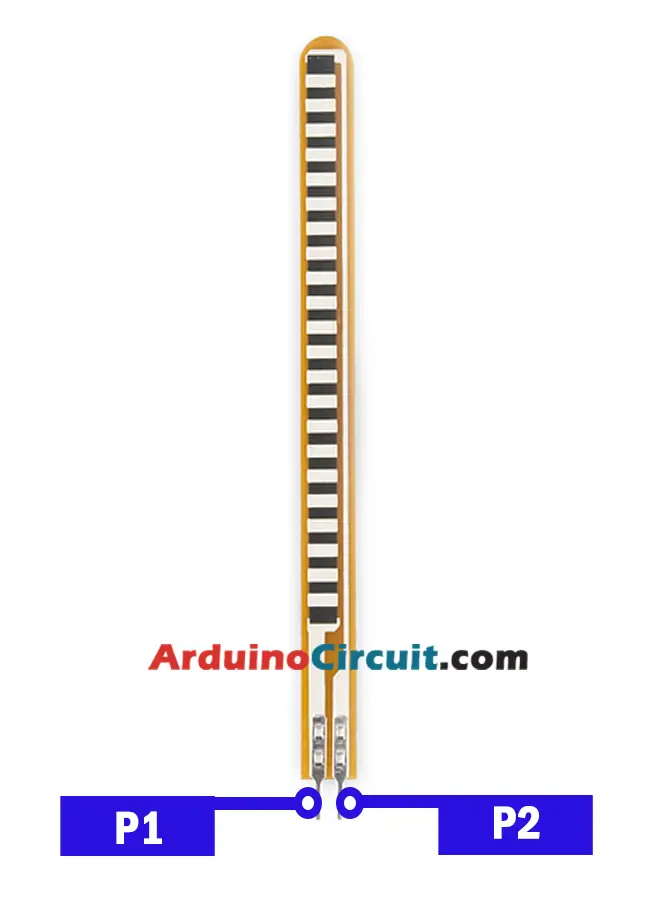
Flex Sensor Pin Configuration
The Flex sensor is a two-terminal device. The Flex sensor does not have polarized terminals like a diode. So there is no positive or negative.
| Pin Number | Description |
| P1 | Usually connected to Positive of power source. |
| P2 | Usually connected to ground. |
Circuit Diagram
The following circuit shows you the connection of the Flex Sensor with Arduino Please make the connection carefully

Installing Arduino IDE Software
First, you will require to Download the updated version of Arduino IDE Software and Install it on your PC or laptop. if you Learn How to install the Arduino step-by-step guide then click on how to install Arduino Button given Blow
Code
//For more Projects: www.arduinocircuit.com

//Constants:
const int ledPin = 3;   //pin 3 has PWM funtion
const int flexPin = A0; //pin A0 to read analog input

//Variables:
int value; //save analog value

void setup(){
  pinMode(ledPin, OUTPUT);  //Set pin 3 as 'output'
  Serial.begin(9600);       //Begin serial communication
}

void loop(){
  value = analogRead(flexPin);         //Read and save analog value from potentiometer
  Serial.println(value);               //Print value
  value = map(value, 700, 900, 0, 255);//Map value 0-1023 to 0-255 (PWM)
  analogWrite(ledPin, value);          //Send PWM value to led
  delay(100);                          //Small delay
}
Applications
- Flex sensors are widely used in various applications such as:
- Robotics: Flex sensors are used to detect the amount of bend or deflection in robotic arms and fingers.
- Gaming controllers: Flex sensors are used in game controllers to detect the amount of movement of the controller.
- Medical devices: Flex sensors are used in medical devices to monitor the movement of body parts such as fingers, hands, and limbs.
- Musical instruments: Flex sensors are used in musical instruments to detect the amount of bend or deflection in the instrument and to control the sound.
Conclusion
Flex sensors are simple and flexible devices that can be used in a variety of applications. They are easy to integrate into any system and provide accurate readings of bend or deflection. Using a flex sensor with an Arduino board is a straightforward process and can be easily accomplished by anyone with basic electronics knowledge.


